-
Notifications
You must be signed in to change notification settings - Fork 0
CordovaSegCourseApp
1 Steps to configure segcourse into android/Cordova application project
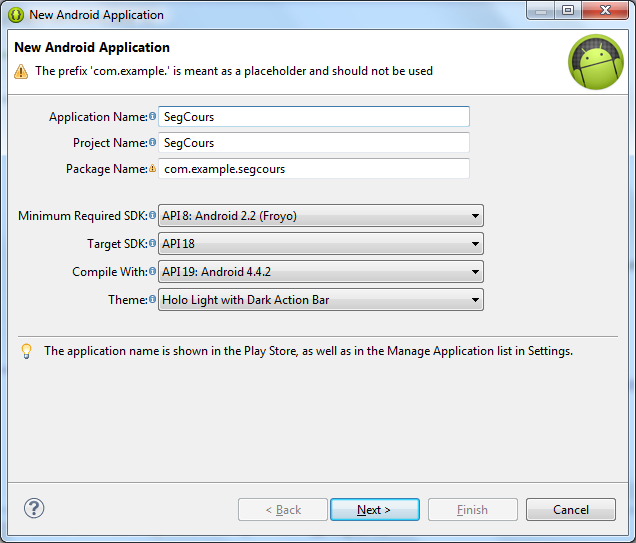
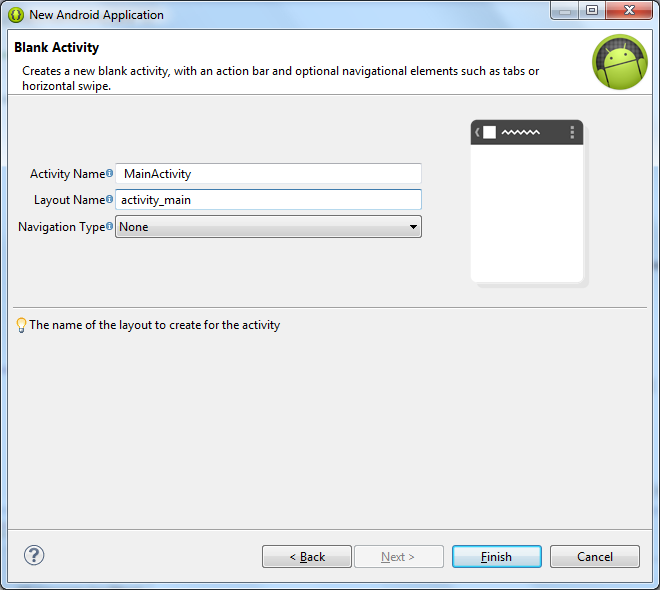
- Create a new android project
- Name the project as segCourse
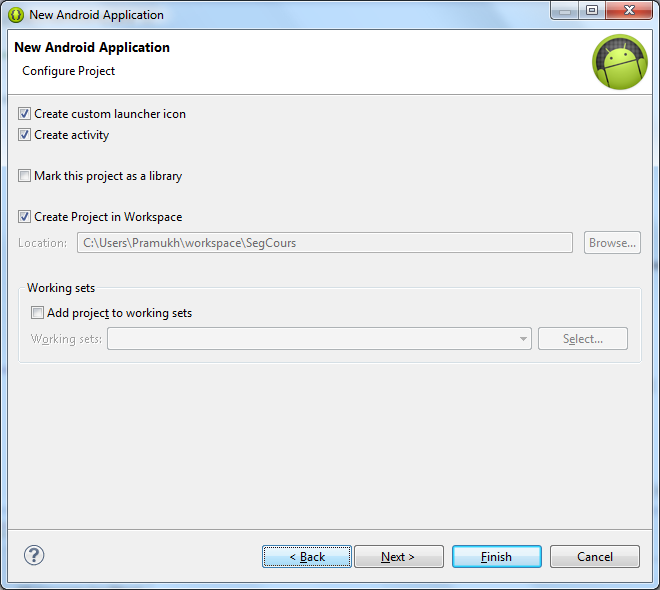
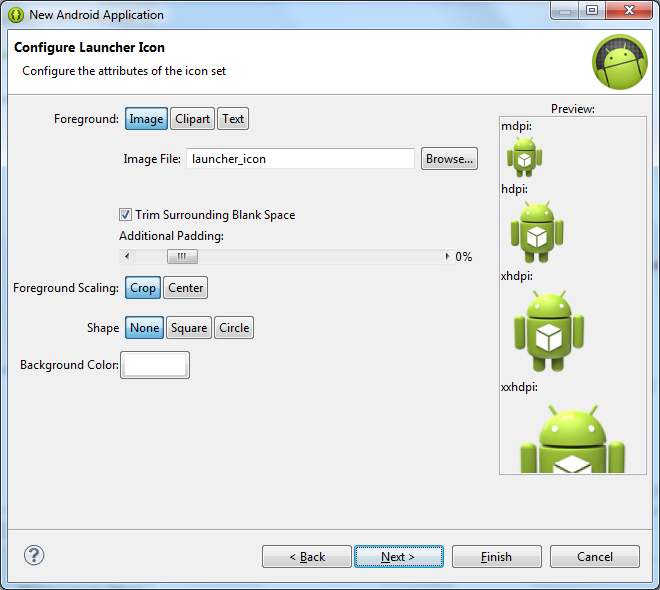
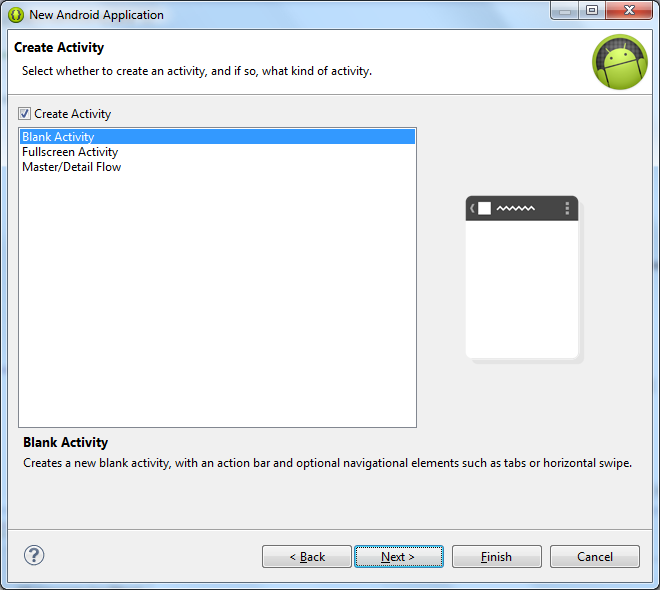
- Follow the steps mentioned in the snapshot until a new empty project is created on your workspace
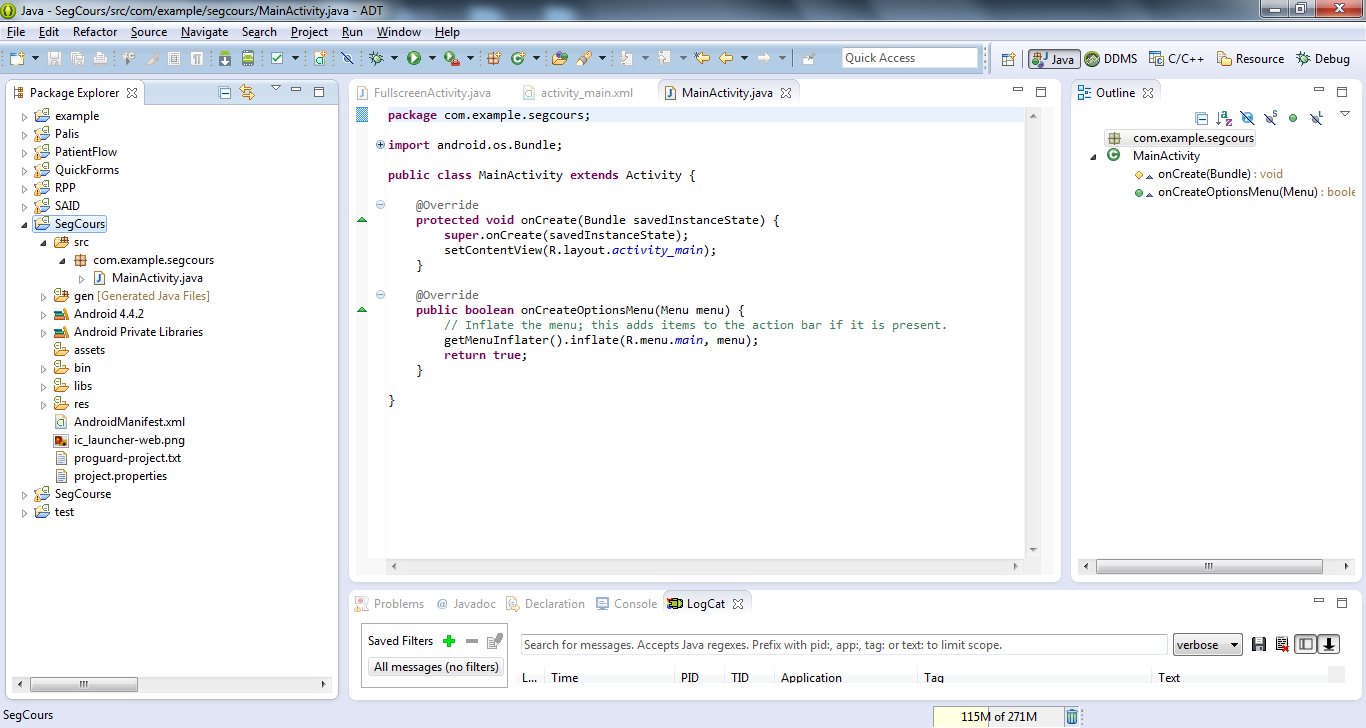
2 Now after the project is created we have three files that has to be added to the project folder in respective places
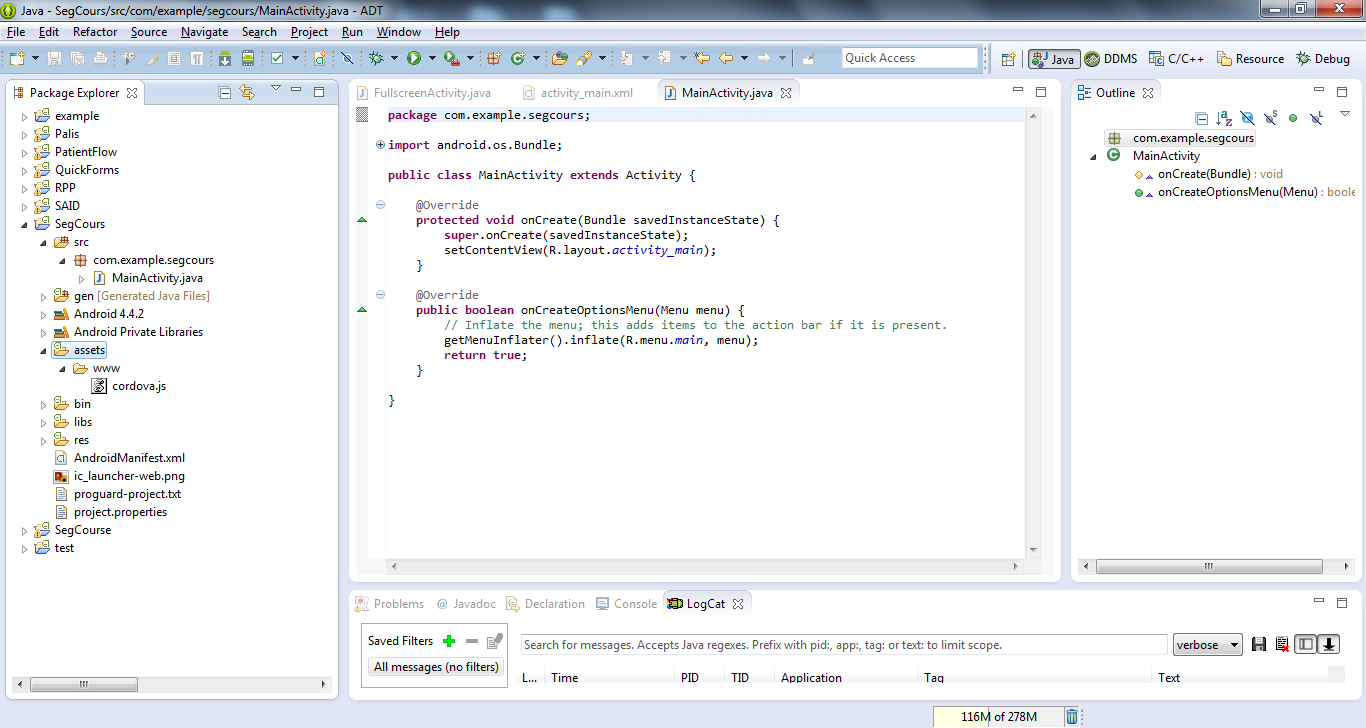
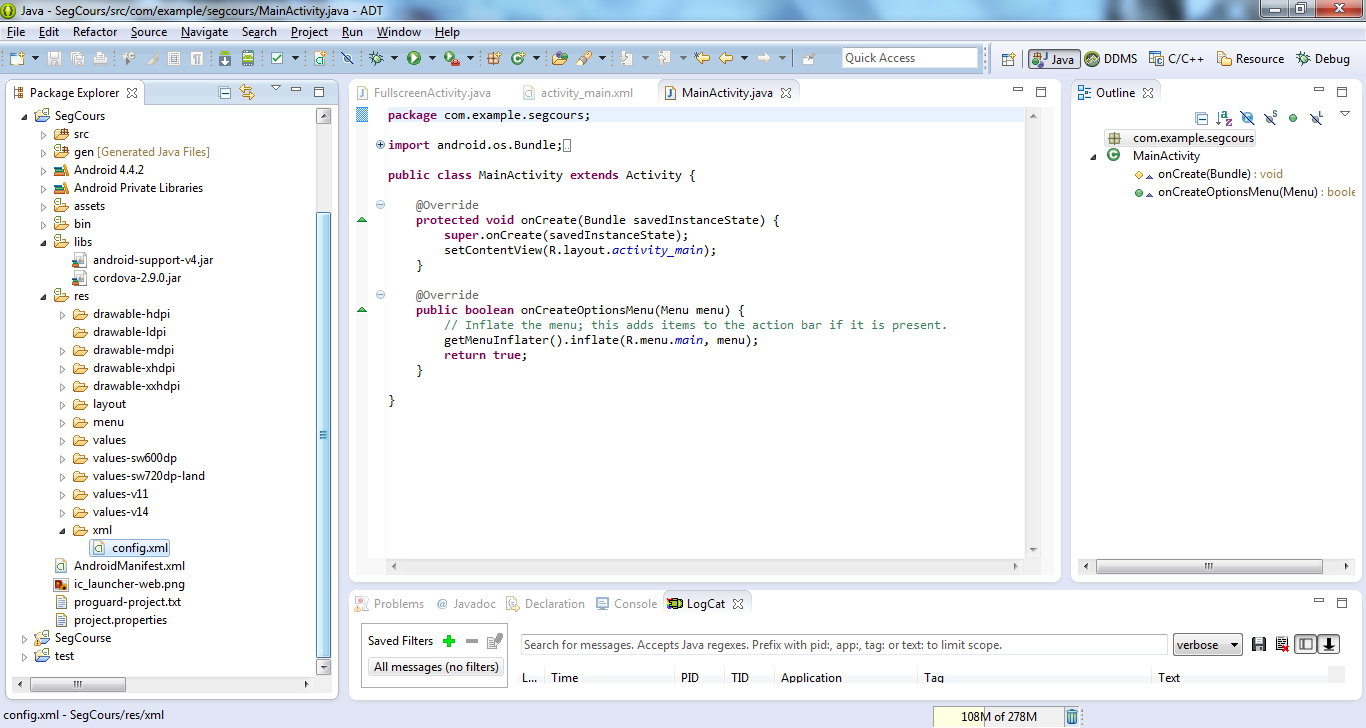
- First, create a folder named www under the asset folder of the created blank project
Paste cordova.js file from the extracted Cordova folder. The cordova.js file is present in the folder Cordova/libs/android/cordova.js Copy and paste the cordova.js into the asset/www/ folder in the project folder of eclipse
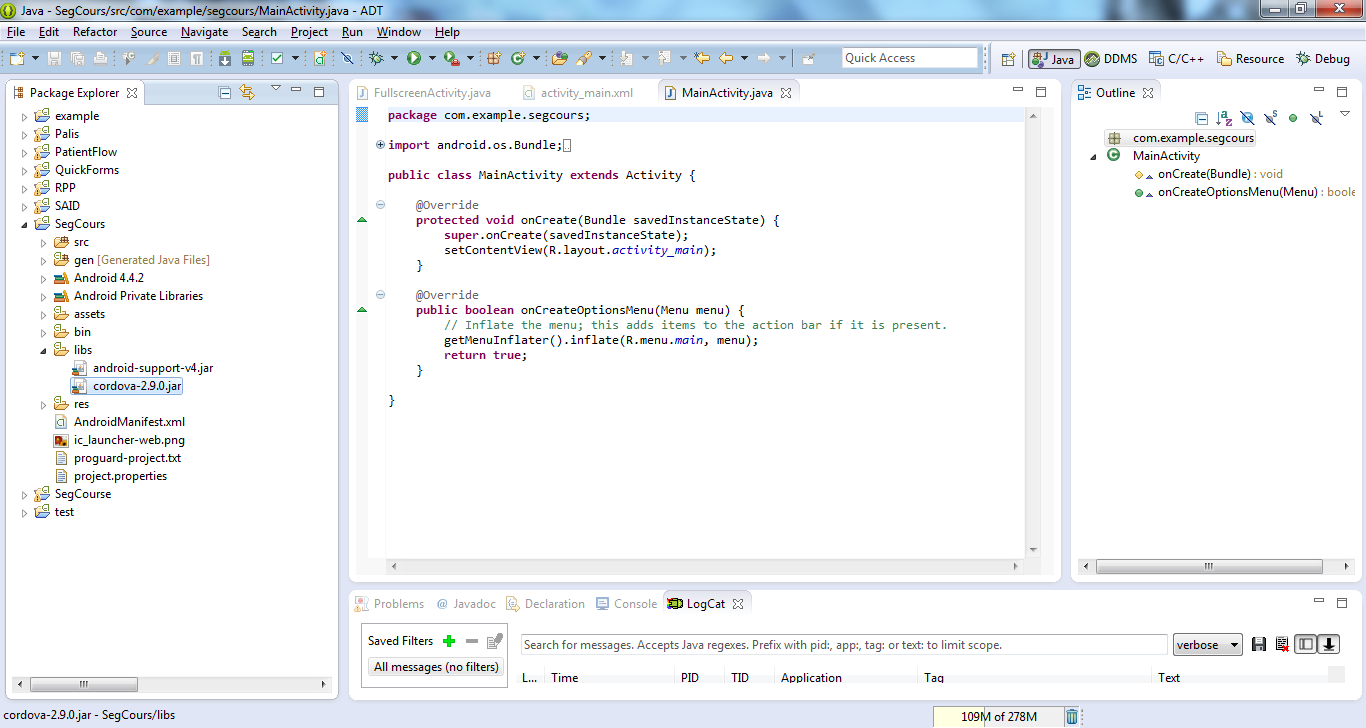
- Second, paste cordova-2,9,0.jar file into the lib folder of the project as seen the snapshot
You will find cordova-2,9,0.jar in the extracted Cordova folder at Cordova/libs/android folder
- Third, create a folder named xml inside the folder res of the project in eclipse
Paste the file config.xml into the xml folder of the project config.xml folder can be obtained from the Cordova folder Cordova/libs/android/xml/config.xml
- After configuring the above three process
Delete all the auto-generated code in main activity and paste the following code.
    package com.example.segcours;
	import org.apache.cordova.DroidGap;
	import android.os.Bundle;
	import android.app.Activity;
	import android.view.Menu;

	public class MainActivity extends DroidGap {

		@Override
		public void onCreate(Bundle savedInstanceState) {
			super.onCreate(savedInstanceState);
			//setContentView(R.layout.activity_main);
			super.loadUrl("http://quickforms3.eecs.uottawa.ca/segcourse/index.html");//url call

		}

		@Override
		public boolean onCreateOptionsMenu(Menu menu) {
			// Inflate the menu; this adds items to the action bar if it is present.
			getMenuInflater().inflate(R.menu.main, menu);
			return true;
		}

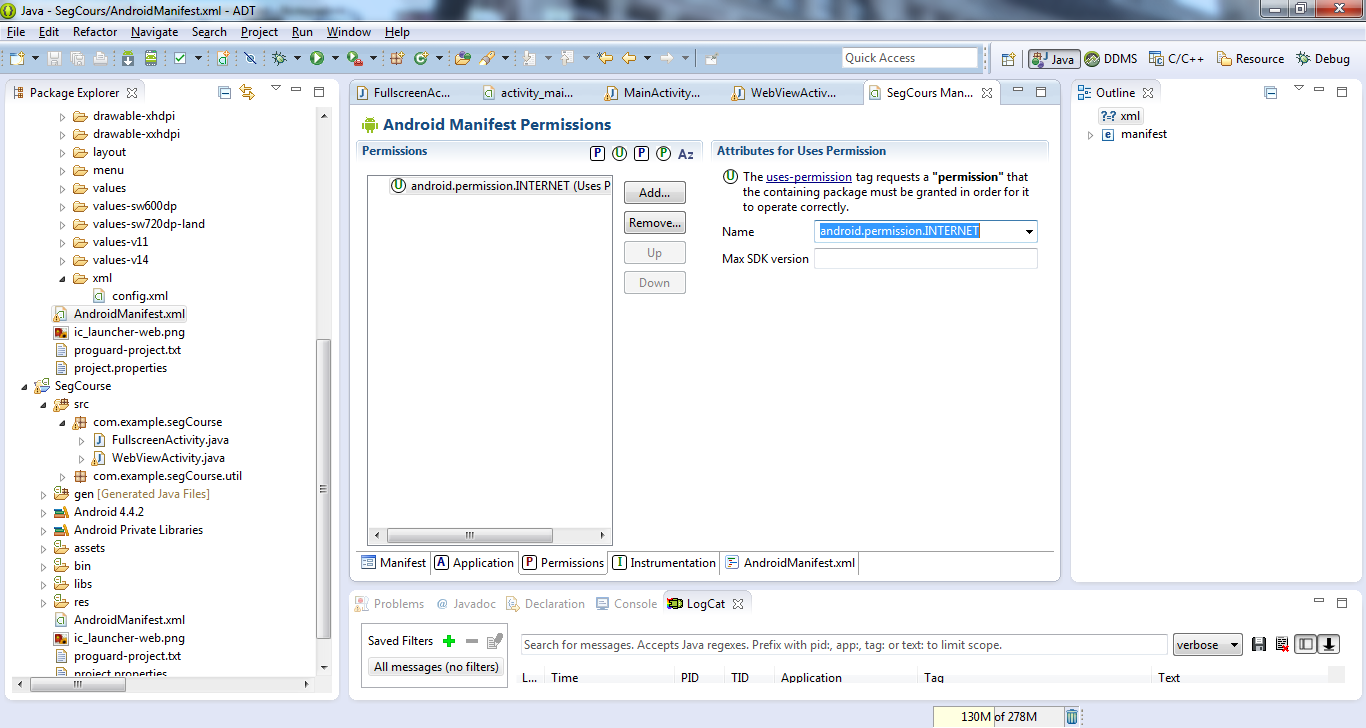
}- Configuring the Android manifest file.
Open the android manifest file to add internet permission add the permission/ uses permission / internet. Follow the snapshot
- Running the created android application
Run the code on android device or emulator as an android application
-
Quickforms Basics
-
Tutorials
- Setup Tutorials
- App Development Tutorials
-
Assignments
-
Project
-
Applications
-
Quickforms Advanced
- Project With Database
- Advanced Setup
- HealthApp with Database
- Source Control
- Joining the Team
- Cordova Native Application
- Miscellaneous
- Project With Database
-
-
Form Controls
-
App Controls
-
Report Controls
-
Server Controls
-
Quickforms DAO
-
Email Notification
-
Migrating QuickForms3(Test Server) to QuickForms(Production-Server)
